
A New facility Introduced by NADRA for Citizens
In this article we will present the flow chart of NADRA facilities during CNIC, B-Form and Family Registration in any NADRA Office.
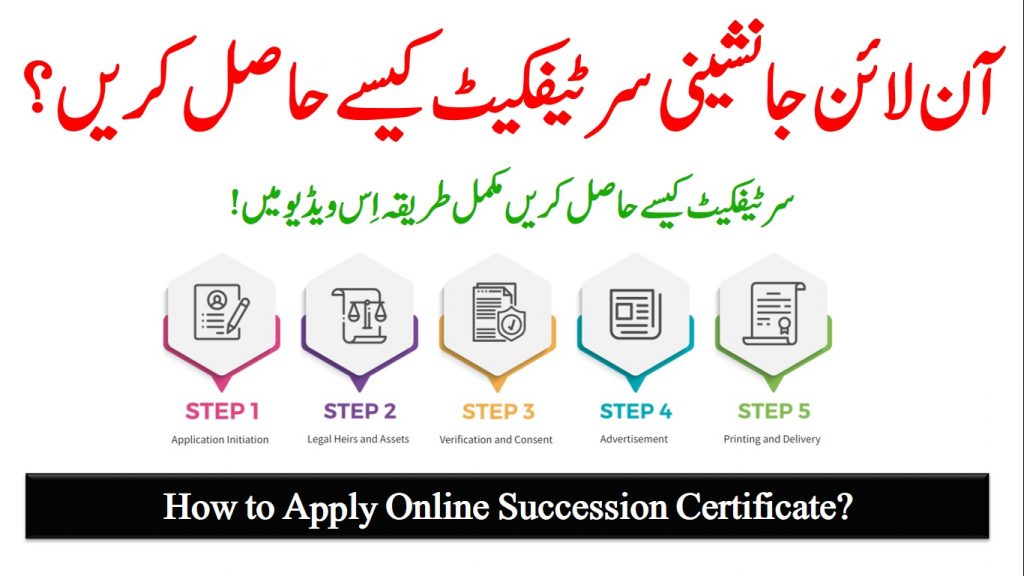
Obtaining a B-Form (Child Registration Certificate) or Computerized National Identity Card (CNIC) from a NADRA (National Database and Registration Authority) center in Pakistan typically involves several steps. I recommend checking the official NADRA website or contacting your local NADRA office for the most up-to-date information. Here’s a general step-by-step guide:
Step 1: Gather Required Documents
Before visiting the NADRA center, ensure you have all the necessary documents. The documents required may vary depending on your specific situation (e.g., applying for a B-Form for a child or a CNIC for an adult), but commonly required documents include:
For B-Form (Child Registration Certificate):
– Child’s birth certificate
– Parents’ CNICs (original and photocopies)
– Proof of residence (e.g., utility bill)
For CNIC (Computerized National Identity Card):
– Proof of citizenship (e.g., old CNIC or any other document)
– Proof of residence (e.g., utility bill)
– Family tree (for tracking lineage)
Step 2: Fill Out the Application Form
You can obtain the application form at the NADRA center or sometimes download it from the NADRA website. Fill out the form accurately and completely. Ensure that all information matches the supporting documents.
Step 3: Visit the NADRA Center
Locate the nearest NADRA center in your area. You can find this information on the NADRA website or by asking locally. It’s advisable to visit the center during its working hours, and it’s a good idea to arrive early to avoid long queues.
Step 4: Submission of Application
When you arrive at the NADRA center, follow these steps:
– Take a token: There will be a token issuance counter where you can obtain a token for your specific service (B-Form or CNIC). Wait for your turn.
– Biometric verification: NADRA staff will take biometric data, including fingerprints and photographs.
– Document verification: Submit your application form and supporting documents to the NADRA officer. They will verify your documents and provide guidance if needed.
– Payment: Pay the required fee for the service at the designated counter. Keep the receipt as proof of payment.
Step 5: Biometric Data Capture
You will be asked to provide biometric data, including fingerprints and photographs. This data is essential for the issuance of your B-Form or CNIC.
Step 6: Review and Confirmation
Before leaving the NADRA center, review your application and the details provided by the NADRA officer. Ensure that all information is correct.
Step 7: Processing and Delivery
NADRA will process your application, and your B-Form or CNIC will be prepared. The processing time may vary depending on your location and the type of document you are applying for.
Step 8: Collect Your Document
Once your B-Form or CNIC is ready, you will receive a notification to collect it from the NADRA center where you submitted your application. Bring your original receipt for verification when collecting your document.
Remember that NADRA processes and requirements may change, so it’s crucial to verify the most recent information and fees on the official NADRA website or by contacting your local NADRA office before visiting. Additionally, consider any COVID-19 related guidelines that may be in place when visiting a NADRA center.
Visit any NADRA Office
Get your required service token from reception.
Wait for your turn
When call your token then go to the desk
Operator will get your fresh picture
You will information the service
Verify your data.
Operator get fingerprint
If he/she say that get this form and follow attestation process
Then ask him that my blood relation is with me for attestation.
Then capture fingerprint and return same form after signing to another counter
You will receive a message from NADRA about data.
After completion SMS also received.
 |  |  |
 |  |  |